A door handle is something we use every day, but we often notice it only when it starts causing problems. A loose handle, a broken latch, or an old design can make your door difficult to open and affect the overall look of your home.
The good news is that replacing a door handle is easier than many people think. With a few basic tools and the right replacement handle, you can remove the old hardware and install a new one without professional help.
In this guide, you will learn how to replace a door handle step by step, including the tools you need, how to remove the old handle, how to fit the new one, and how to avoid common installation mistakes.
What Are the Three Types of Door Handles?
Door handles come in different designs, but the three most common types are door knobs, pull handles, and lever handles. Each style has its own purpose, appearance, and level of convenience depending on where it is installed.
Door Knobs
Door knobs are one of the most traditional types of door hardware. They feature a rounded design that you turn by hand to operate the latch. They are commonly found on interior doors and work well with classic or traditional home designs.
Although door knobs are simple and reliable, they can require more grip strength compared to lever handles. They are available in different finishes and styles, making them a popular choice for bedrooms, closets, and other interior spaces.
Pull Handles
Pull handles are designed mainly for pulling a door open rather than operating a latch mechanism. They are commonly used on wooden doors, glass doors, sliding doors, and commercial spaces where easy access is important.
These handles come in different sizes and materials, offering both functional and decorative benefits. Large pull handles can also create a modern appearance and are often used as a design feature on contemporary doors.
Lever Handles
Lever handles are one of the most common choices for modern homes because they are easy to operate and practical for everyday use. They feature a horizontal handle that moves downward to open the door.
They are widely used for interior doors, including bedrooms, bathrooms, and offices. Lever handles are especially convenient for people who may find turning a door knob difficult and are available in many modern styles and finishes.
Tools and Materials You Need to Replace a Door Handle
Replacing a door handle is a simple job when you have the correct tools and the right replacement hardware. Before starting, check your existing handle, latch, and fixing points to make sure the new handle will fit your door properly.
In most cases, you only need basic tools. However, some replacements may require extra equipment if the new handle has different measurements or if you need to adjust existing holes
Essential Tools and Materials
- Phillips screwdriver: Used to remove old screws and secure the new handle.
- Flat-head screwdriver: Helpful for removing covers or loosening certain screws.
- New door handle set: Includes the handles, spindle, latch, and fixing screws needed for installation.
- Tape measure: Helps check door measurements, backset size, and handle alignment.
- Pencil: Useful for marking screw positions or making small alignment points.
- Allen key: Often needed for modern lever handles with small adjustment screws.
Optional Tools for Adjustments
Some installations may need additional tools, especially if the new handle does not match the old fittings.
- Drill: Useful if new screw holes need to be created or existing holes need adjustment.
- Chisel: Helps enlarge or adjust the latch recess in the door.
- Wood filler: Useful for covering old holes if the new handle has a different fitting position.
- Paint: Helps match repaired areas with the existing door finish.
- Utility knife: Useful for creating clean edges around latch plates before making adjustments.
Having the right tools ready before you begin makes the replacement process smoother and helps you install the new door handle correctly without damaging the door.
How to Replace a Door Handle Step by Step Guide
Replacing a door handle is a straightforward DIY task when you follow the correct process. By removing the old hardware carefully and installing each component properly, you can restore your door’s function quickly.
Before starting, make sure you have the correct replacement handle and required tools. Taking time to check compatibility helps prevent fitting problems and ensures a smoother installation.
You Will Need:
- Screwdriver
- Drill (optional)
- Tape measure
- Masking tape
- Sanding paper
- Allen key (optional)
- Replacement latch (if required)
- New door handle set or knob
Step 1: Remove the Old Door Handle
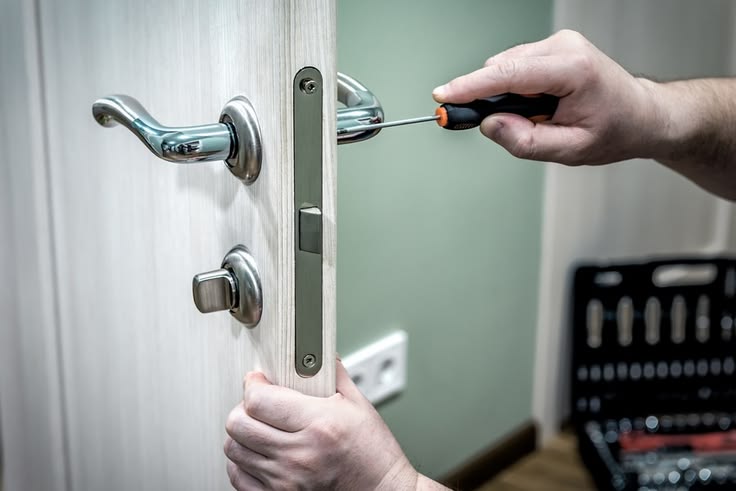
Begin by opening the door completely to access both sides of the handle. Remove the visible screws using a screwdriver, or remove the cover plate if the screws are hidden underneath.
Once the screws are removed, gently separate both sides of the handle from the door. Pull out the spindle connecting the handles and keep all small parts together safely.
Step 2: Check or Remove the Old Door Latch
After removing the handle, inspect the existing latch mechanism inside the door edge. Check whether it moves smoothly and works correctly with your new handle before deciding to replace it.
If the latch is damaged, stiff, or does not match the replacement handle, remove the screws holding it in place. Carefully pull out the old latch and prepare the opening.
Step 3: Install the New Door Latch
Insert the new latch into the opening on the edge of the door. Make sure the angled side faces the direction the door closes so it operates correctly.
Secure the latch with the provided screws and ensure it sits flat against the door surface. A properly installed latch helps your handle work smoothly and keeps the door closing correctly.
Step 4: Insert the New Spindle
The spindle is the small metal bar that connects both sides of the handle and controls the latch movement. Slide it through the latch opening until it sits correctly.
Check that the spindle moves freely without resistance before attaching the handles. Incorrect spindle placement can cause the handle to feel loose or stop working properly.
Step 5: Attach the New Door Handle
Place one side of the new handle onto the spindle from one side of the door. Attach the second handle from the opposite side and align both pieces evenly.
Tighten the fixing screws carefully until the handle feels secure. Avoid applying too much pressure because overtightening can affect movement or damage the handle components.
Step 6: Test the New Door Handle
After installing the handle, press it several times to check its movement and performance. Make sure the latch retracts fully and the handle returns to its original position.
Open and close the door to confirm everything works correctly. Check the lock function if included, and adjust any loose parts before completing the installation.
Can You Change a Door Handle Without Changing the Lock?
Yes, in many cases, you can replace a door handle without changing the entire lock system. If the existing latch and lock mechanism are working correctly, you only need to replace the handle that has become damaged, loose, or outdated.
Before buying a new handle, check that it matches your existing door hardware, including the spindle size, latch type, and fixing points.
When You Can Replace Only the Handle
You can replace only the door handle when:
- The existing lock and latch work smoothly
- The new handle matches the current spindle size
- The screw holes align correctly
- The door closes and locks properly
In these situations, replacing only the handle is a quicker and more affordable solution.
When You Should Replace the Complete Lock Set
You may need to replace the entire lock set if:
- The latch is damaged or stuck
- The lock no longer works properly
- The internal mechanism is worn out
- The new handle is not compatible with the existing hardware
Replacing the complete set can improve security and ensure all parts work together correctly.
Common Mistakes to Avoid When Replacing a Door Handle
Changing a door handle is usually simple, but small installation mistakes can affect how smoothly it works. Avoiding these common errors will help you install your new handle correctly the first time.
- Installing the latch incorrectly – The latch must face the correct direction so the door closes and locks properly. An upside-down or reversed latch can stop the handle from working.
- Not checking compatibility – Always compare the new handle with your existing hardware. Incorrect measurements, spindle sizes, or latch types can cause fitting problems.
- Leaving screws too loose or too tight – Loose screws can make the handle wobble, while overtightening can damage the threads or affect handle movement.
- Ignoring door thickness – A handle set may not fit properly if your door is thicker or thinner than the recommended size. Check measurements before buying.
- Skipping the final test – Always test the handle after installation. Check that the latch moves smoothly, the door closes properly, and the lock works correctly.
- Poor spindle alignment – A wrongly positioned spindle can prevent the handle from moving the latch properly. Make sure both sides connect correctly before tightening screws.
- Not following manufacturer instructions – Different handles may have specific installation requirements. Reading the instructions helps avoid unnecessary mistakes.
Ready to Replace Your Door Handle?
A broken or outdated door handle can make your door frustrating to use. If you need help choosing the right hardware or want professional assistance with installation, our team is here to help.
Get expert guidance and reliable solutions for your door handle replacement needs. Contact Us today to discuss your requirements.
Frequently Asked Questions
Is it easy to replace a door handle?
Yes, replacing a door handle is usually a simple DIY task. Most interior handles can be changed with basic tools and a few easy steps.
Can I replace a door handle myself?
Yes, you can replace most door handles yourself if the new handle matches your door size, latch, and existing hardware.
Do all door handles fit the same?
No, door handles come in different sizes, styles, and mechanisms. Always check measurements like door thickness, backset, and spindle size before buying.
How long does it take to install a door handle?
Most standard door handle replacements take around 30 minutes to one hour, depending on your experience and the door type.
Can you replace a door handle and keep the same key?
Yes, in many cases you can keep the same key if the new handle is compatible with your existing lock cylinder. Check compatibility before replacing the hardware.
How much does it cost to replace a door handle?
The cost depends on the handle type and quality. A DIY replacement usually costs less, while professional installation adds labour charges.
How long does it take to install a door handle?
A typical interior door handle can be installed within 30 minutes. More complex exterior handles may take longer due to locking components.